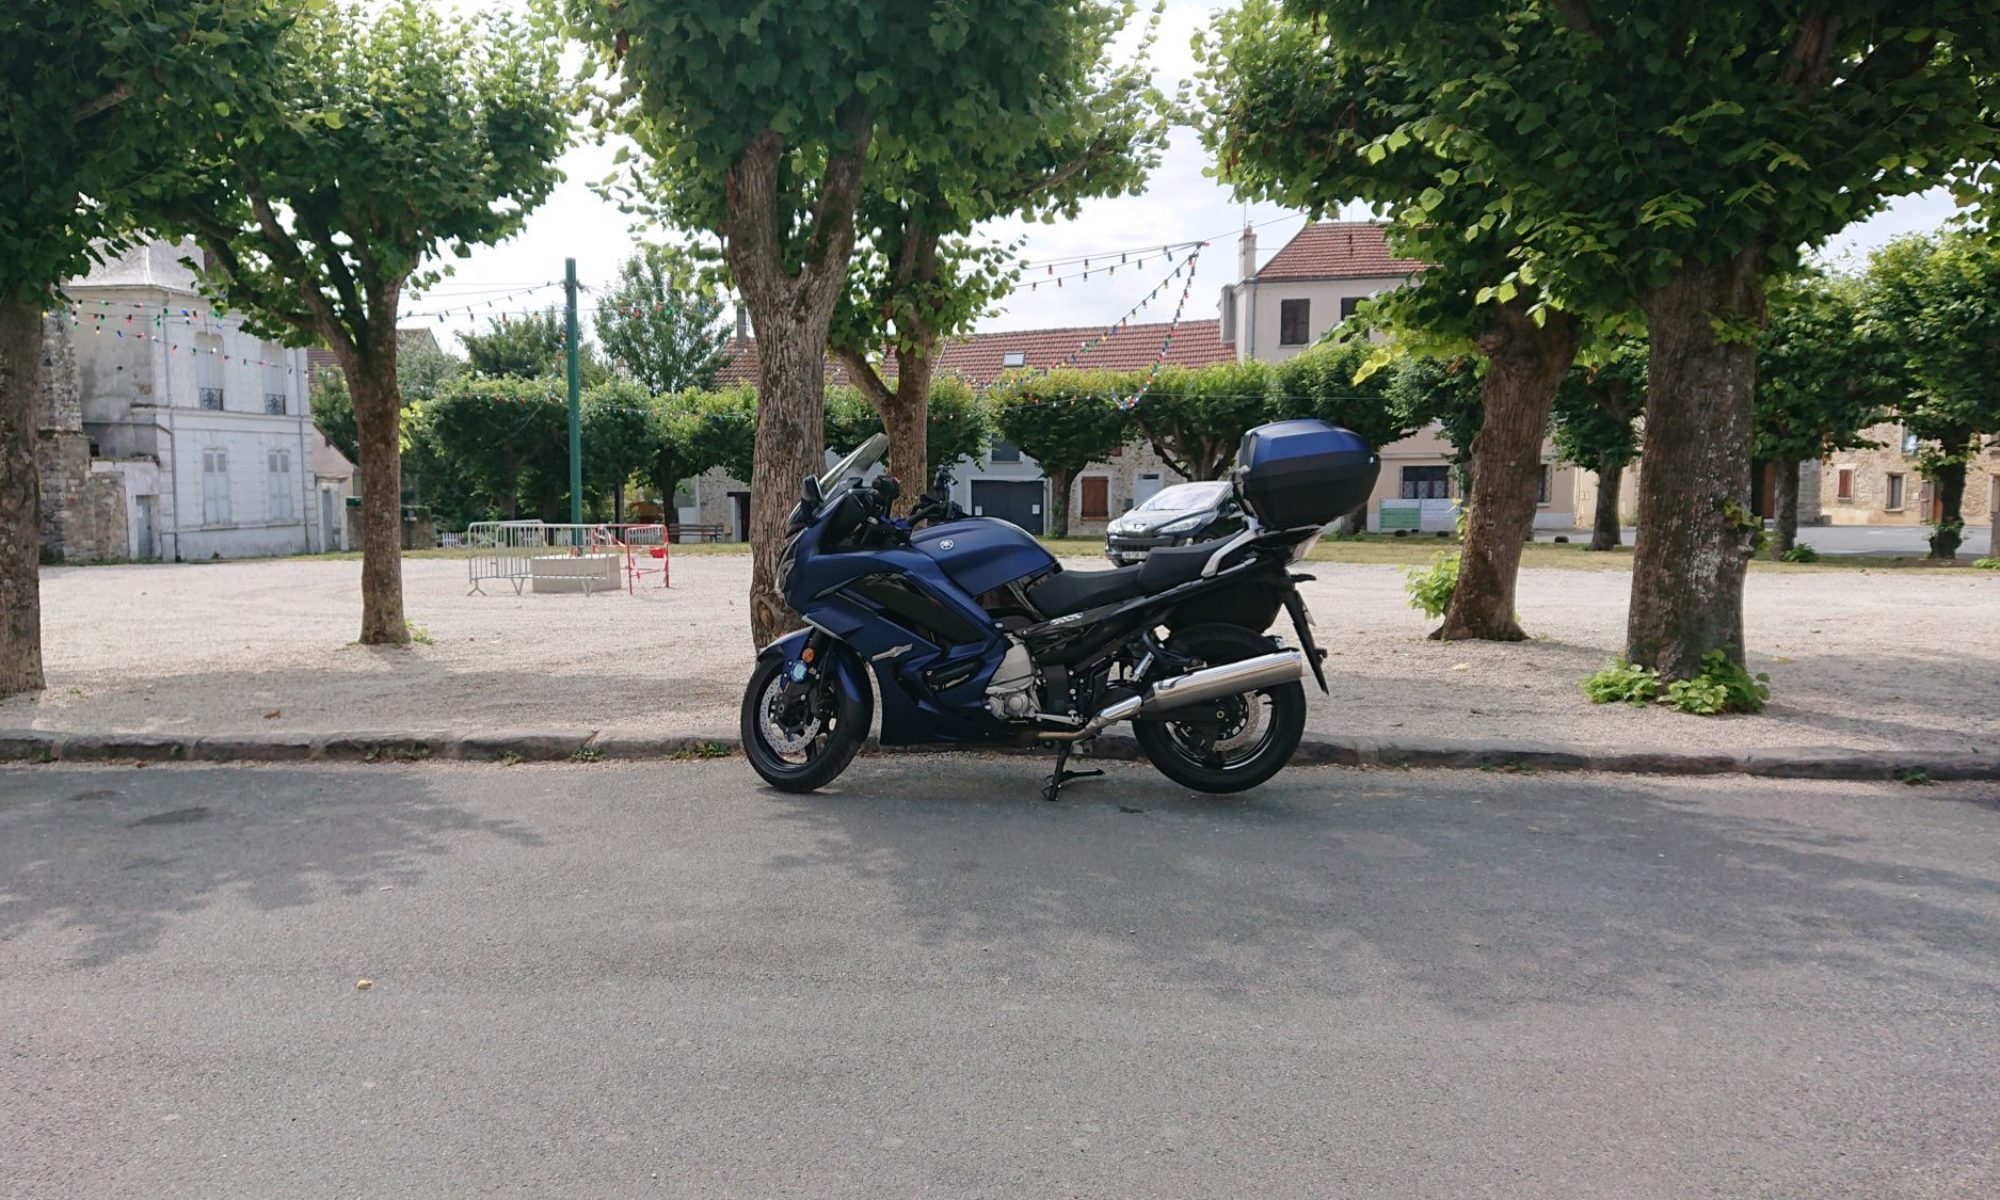
Released nine months ago, and after a number of upgrades, is the Aoocci BX better? In “The Upgraded Aoocci BX – What’s it like to use?” We take a look at using the Aoocci BX in the real world.
Would I buy the Aoocci BX again? Yes. Though, the proof of the pudding is in the eating, so we will need to see how well it performs in the real world…
A good system but there are some issues to be overcome
The Aoocci BX arrived promptly, though Customs clearance took a day or two.
The unit is very well packaged and comes with nearly everything you need to install it on most motorcycles.
The screen is clear and bright enough for most conditions. The road names on the maps are easily readable which is a huge improvement over my large screen mobile phone.
The Radar system works very well and is especially useful at traffic lights and intersections.
The camera resolution is suitable as a dashcam. It is clear and you can read the number plates of the vehicles. It can, at a pinch as an inlay, be used in a video.
The GPS works well though the speed display on the saved video doesn’t match the speed display on the head unit. It is about 10% faster on the saved mp4 files. Why? This could be a potential problem when used as evidence.
Android Auto system from Google has some limitations The Apple Car Play system seems to provide a better experience (I haven’t got an Apple phone so can’t comment further on that).
Would I buy the Aoocci BX again? Yes, even with the issues listed below I like the unit.
Once setup (see below), it connects seamlessly to Android Auto. But, by making a “one size fits all” unit, there are a number of issues to be addressed. These are:
1. Upgrades:
1.1 After an upgrade/update the system forgets all your settings and peripherals (tyre pressure monitors and radar), these need to be manually reentered. A system to store these settings would be beneficial.
1.2 Upgrades are fairly regular which is excellent but, having to reenter your settings each time is irritating.
1.3 The system needs to reconnected to your phone after each upgrade. This doesn’t always work first time or, if it does, it takes quite a long time (up to a minute or longer) before the connection is properly established. This, of course, could be a problem with Android Auto. If it is, more information in the manual would be useful.
1.4 After an upgrade, sometimes you will receive the errors: “Android Auto has encountered an unexpected error” and “Waze has encountered an unexpected error”. More information would be helpful like an error code which could be referenced in the FAQ on the website. The only way I have found to fix this is to completely disconnect the unit from the power for at least 1 minute. Cycling the ignition doesn’t seem to work.
1.5 After an upgrade, Waze shows a black screen. You still receive the navigation instructions in your helmet or the unit’s speaker. Just no map. Again, to fix this completely disconnect the unit from the power for at least 1 minute.
2. Tyre pressure monitor:
2.1 The units that fit on the valve stems are rather large, though very light. Unfortunately, if you have angled valve stems they catch on the brake callipers so can’t be used until the valve stems are changed.
2.2 Changing the minimum and maximum thresholds in PSI necessitates pressing the plus or minus sign a large number on times. In my case over 80 to get the correct thresholds for my motorcycle. It is easier working in “Bar”, but I work in “PSI”.
2.3 The batteries had nearly died on the units. New ones had to be sourced to make the monitors work. A system to disconnect the batteries in transit until they are fitted to the valves would be beneficial (plastic film or don’t fit them?).
3. Installation:
3.1 The cables are the wrong length for nearly every bike. This is due to the “one size fits all” nature of the unit. It would be better to provide cables of about 0.5 metre in length and have extension cables available in the box to extend those that need extending. The only exception could be the power cable for the Radar unit which, for my bike, was the perfect length.
3.2 The “Pigtail” cable from the unit itself could benefit from being slightly longer (double the length?)
3.3 The breakout cable that connects to the “Pigtail” cable could do with being longer (double the length?)
3.4 The knurled connectors can work themselves loose over time, even when they are firmly pushed together and fully tightened. Possibly a clip system would be better and, possibly, smaller? I used heat shrink over them to a) stop them coming loose and b) stop the metal scratching the paintwork.
3.5 The “Power brick” on the power cable is in the centre of the cable. It should be nearer one end (the battery end would probably be best) to make installation easier. This cable had to be extended by about 0.5 metre to reach the power supply under the seat in order to place the power brick in a sensible position. This meant there was a lot of excess cable to be hidden on the other end.
3.6 Two or three covers for any unused connectors on the breakout cable would be useful. There is already one on the pigtail end which is very useful. Having said that, I am using all the peripherals.
The recent software upgrades have made it much better. There are, as previously mentioned, still some gremlins to be worked out.
Installing the Aoocci BX Quick Release Mount is an easy task though, there are a few “Gotchas”. In this video we go through the install highlighting the areas you need to be mindful of.
We need to mount the Aoocci BX Unit. To do that we installed the Telferizer Steering Head Nut and Ram Ball Mount in Rider Ramblings 234. The new Steering Head Nut is an engineering work of art, made out of, I think, Stainless Steel.
In Part 1, we unbox the Aoocci BX and set up some of the parameters. We also uncover a rather expensive, hidden subscription “trap”, which could be why these systems are so cheap to buy. In the next video we will install the Aoocci BX on the motorbike and finish setting it up.
There is always a tyre inflator on my bike. So, which ones are on my bikes…
As to tyre inflators, there are pros and cons to both – Yes, I have both and much prefer the Battery ones as I don’t need to run the bike (hot exhausts) and fit higher draw 12v electrical sockets on the bike. Don’t use the 12v socket in the glove box you’ll blow the fuse!
Battery (lithium-ion) inflators are the most convenient and some can also be used as a 12v and/or USB charger. They usually come with LED screens, are usually very accurate and are easy to operate.
The battery inflator on the FJR is used every day to check the tyre pressures on the bike I’m riding that day (yes, I check the cold tyre pressures every day. I believe tyres are that important) and recharged every week (more often if required). It is now over 4 years old and, because it is being exercised regularly, the battery is in good condition and will inflate a motorcycle tyre from flat more than twice on a single charge – DAMHIK! This one will fit under the seat of a 2019 FJR:
FJR: https://amzn.to/3mSRhns – Oasser Tyre Inflator Electric Bike Pump LCD Display with Rechargeable Li-Ion Battery LED Light 150PSI 12V Black
I have a second battery tyre inflator that has just given up the ghost after 7 years which was kept on my NT700VA Honda Deauville. This one was used every day to check the tyre pressures on the bike and recharged every week (more often if required) until I got the one above. Then it was used intermittently. Oasser claim it will inflate a flat motorcycle tyre 8 times on a single charge. It is a little bigger, but more powerful, than the one on the FJR and won’t fit under the seat. To be able to fit under the seat it needs to be less than 8″ long and preferably <= 7.8″ long.
NT700: https://amzn.to/3Jtae82 – Oasser Tyre Inflator Car Tyre Pump 12V AC/DC Portable Air Compressor with 2000 Large Capacity Battery Rechargeable Li-ion Battery 120PSI 20 litres/Min
Both the Oasser tyre inflators come with a 12v and mains (110v – 240v) charging system. So, using the 12v, you can recharge it on the FJR using the 12v glove box socket provided you don’t run the pump at the same time.
I’m looking at replacing it with a Fanttik: https://amzn.to/3JJxekf The downside with the Fanttik is the length of the hose which is quite short.
I have found that the “wired” tyre inflators tend to have analogue gauges which, usually, aren’t as accurate.
For balance, here are a selection of motorcycle tyre inflators both battery and “wired”: Selection of motorcycle tyre inflators: https://amzn.to/3JIUT4g
Also, I have ridden 10s of 1,000s of miles with plugged tyres (mushroom type – best, and with gummy worm type). I’ve never had a problem. Admittedly, my speed was rarely above 70 mph. I wouldn’t have any qualms riding with plugged tyres. So repair your tyres on the go and check the cold pressures regularly.
In “How to Lift the NT700 Deauville Fuel Tank” we look at how you can get access to the Air Box in order to change the Air Filter on a Honda NT700V Deauville 2006 → . We also discuss some tips and tricks as to making re-assembly easier.. (Video at the bottom of the page).
Remove the Seat and take out the Tool Kit (non-US models) – All the work can be carried out with the tools in the OEM Tool Kit, though you’ll find using a 10mm socket with ratchet and a magnetic, cross head screwdriver easier.
Remove the Rubber Heat Shield from between the Seat and the Tank – This reveals the bolt and the Cable Holder at the rear of the Tank
Remove the Glove Box Lids by lifting them slightly and pulling towards the rear of the bike
Remove the screw in the Side Cowlings (one on each side of the bike)
Remove the Hex Head Bolt from the rear of the Glove Boxes (use the Hex Key from the Tool Kit)
Remove the two Bolts at the front of the Petrol Tank which hold the Glove Boxes and the Tank to the Frame
Remove the two Bolts which hold the Glove Boxes to the Facia (below the speaker grills)
Remove the Side Cowlings by first pulling the tab towards you – This releases the clip. Then pull the Side Cowling towards the rear of the bike
Release the Cable from the Clip at the rear of the Petrol Tank
Then loosen the rear Petrol Tank Bolt a few turns – It’s not necessary to remove it Just loosen it a little
There are tabs on the Petrol Tank which Fit into Loops on the Glove Box Covers, so they can’t just lift up. So pull the covers towards the outside of the bike as you lift them. They take a bit of manoeuvring to get out. Don’t forget to disconnect the accessory socket – if it’s fitted
Remove the 10mm bolts holding the sides of Petrol Tank to the Frame
Lift the Front of the Petrol Tank, it will pivot on the rear bolt, and secure it with a Bungee or a strap
You can now remove the top of the Air Filter Housing. There are 9 Screws! Put cloths into the Venturi to stop anything falling into the cylinders (remember to remove the cloths when replacing the housing)
You can now change the Air Filter – just lift it out and replace it.
Re-assembly is the reverse of disassembly – though there are a few “gotchas“
Replace the Air Filter Cover. It only fits one way round and takes a bit of fiddling – the 9 screws are into plastic so don’t over-tighten IMPORTANT
Remember to reconnect all the connections to the Air box. It’s easy to forget one or not connect it correctly. DAMHIK!
Lower the Tank, Re-tighten the Pivot 10mm Bolt & replace the cable in the cable holder
Replace the 10mm bolts holding the sides of the tank to the frame
Replace the Glove Boxes. This takes a little finagling as the box has to fit past the bolting point. Don’t forget to reconnect the accessory socket – if it’s fitted
The loop on the underside of the Glove Box has to connect with a tab on the Glove Box. The Velcro Tab will make life difficult. So Place a piece of paper or card between the two Velcro pieces while manoeuvring it into place
Align the Bolt Holes at the front of the tank. Note the Glove Boxes are “Keyed”. One slots into the other
Replace the two bolts at the front of the Glove Boxes but don’t fully tighten yet
Replace the Hex Head Bolts below the Glove Boxes.
Finally, tighten ALL the Glove Box Bolts
Replace the Side Cowls – There is a hook on the underside of the Glove Box pieces which slides into the Side Cowls – attach this first and slide the cowls towards the front of the bike. Then clip the bottom hooks into place. Finally, ensure the bullet connector at the rear of the cowl is connected
Replace the Tank Heat Shield – There is a grove in the bottom which locates onto the panels next to the frame
Insert and tighten the Bolts in the Side Cowls
Replace the Glove Box Lids – They locate and clip into place At the same angle as they came out
Replace your Tool Kit – You can do a lot of the basic work on your bike with it
I hope to have more lighting in the garage soon so you’ll be able to watch videos of the process not just a montage of stills.
How to lift the Deauville NT700 Fuel Tank
Thanks for watching. Please Like, Comment, Share and Subscribe
There have been occasions when the side cases on the FJR1300 have become detached while riding, especially after hitting a bump or deformity in the road. Only just the other day someone posted on another site about one of his Panniers becoming detached and self destructing on the road. Luckily this hasn’t happened to me. Even so I decided to do something about it. The video on How to Pin the Panniers on a Yamaha FJR1300 is at the end of this post.
With that in mind I decided to pin my panniers. It turned out to be a very easy job – the basic work took less than 15 minutes to complete both sides. As I have rear crash guards and decided to paint the clevis pins, it took about an hour or so in total.
I’ve found that since doing it the panniers don’t move at all. Whereas before they would rattle a little. Also, when they are full, the bike seems more stable at the rear probably due to the lack of movement.
The minimum you need to do the job is two 55mm x 6mm (2¼” x ¼”) or slightly longer Clevis Pins, a 7mm (5/16”) drill bit and a drill. (Selection of Clevis Pins)
Steps:
Optional – Paint Clevis Pins
Remove Rear Crash Bars if fitted
Offer up drill to the side case and place a lot of Masking Tape on the Panniers where the drill touches
Glue Rubber Stays back in place if necessary
Optional (recommended) – Drill a small pilot hole centred 7mm from the long flat side of the case support and centred between the two ribs
Drill the hole through the case supports and rubber stays (centred 7mm from the long flat side of the case support and centred between the two ribs)
Optional – Cut Heat Shrink Tubes to size 95mm (4 5/8″) long
Optional – Spray small amount of White Grease into the heat Shrink Tubes and slide them onto the Round Wire loops on the Clevis Pins
Optional – Shrink the Heat Shrink tube with a heat gun
Insert the Clevis Pins
I made a video and took some photographs of the procedure. There is no lighting in the garage, so the video footage was very grainy and not usable. Luckily, pictures were taken of each step using a mobile phone with a flash. The video below, therefore, is a montage of those pictures and more than adequately shows the items and the steps necessary to do this very simple job.
The Top Sellerie Deluxe Comfort Gel Seat was ordered online 14th January. I had a replacement Seat Pan so I sent that off the next day. I received a confirmation that the Seat Pan had arrived and was given a provisional shipping date of 19th February. On 6th February I received an email to tell me that the seat was being shipped and I received it on 12th, a whole week earlier than expected – Well done Top Sellerie!
Remanufacture: Send your original seat and receive your new seat about 4 weeks later. Pros: Cheapest and you keep your own seat pan. Cons: You can’t ride your bike for about a month! Finding a way to send your seat to them.
Seat Exchange: Use their own seat pan and receive your new seat in about 1 week to 4 weeks depending on whether they need to build it or have one in stock. You then send your original seat back to them (you also need to pay a relatively hefty deposit which you get refunded when they receive your seat). Pros: Cheaper and you get to ride your bike while the seat is being made. Cons: Paying a hefty deposit and having to find a way to send your seat back to them
Buy a New Seat: Buy a complete seat from them. Waiting times are similar to Seat Exchange. It’s also the most expensive. Pros: You get to ride your bike while the seat is being made and you’ve always got your old seat if you need it. You can also sell your old seat to recoup some of the cost if you want. Cons: Cost
Customer Service
Top Sellerie’s customer service is excellent. They informed of the receipt of the seat pan and of the shipping.
Delivery
Delivery is via a Courier Company. Mine was delivered by DHL. Top Sellerie seem to have a number of outlets, depots and facilities in different countries and mine was shipped from Portugal. DHL had initially given a delivery date of 14th February but, it arrived two days earlier. Luckily, someone was here to receive the delivery.
What’s in the Box?
The seat in clear plastic bag and bubble wrap, and a note, in various languages, asking to send a photo of the seat on the bike. The seat was well protected by the bubble wrap and the outer packaging had stood up well to the delivery. If you order the Seat Exchange, you can use the same packaging to send your old seat back to them. I’m using the packaging to store my original seat safely in the garage.
The Gel seat is heavy! It’s about twice the weight of the original seat. The piping on the edges, the embroidery and stitching look very good indeed to my untrained eye.
The gel is firm and the covering material feels very good. The cover is stapled to the seat pan and they’ve used a lot of staples. They’ve also used three “studs” to secure the “hump” behind the rider’s seat.
Fitting
The seat takes a lot of finagling to fit for the first time. This is due to the extra size of the front portion of the seat. I initially thought that there was a problem with the seat pan but, I checked the Honda part number and measured all the fasteners and holes and they were exactly the same except one of the holes which was about 0.25 mm smaller so I “dremelled” it to the same size.
The knack to fitting the seat the first time is to put the bike on the centre stand. Make sure it won’t rock forward so put something in front of the front and/or rear wheel and brace your leg against the passenger foot rest, you’ll see why in a moment. Slot the seat into place, it won’t lock down at this point. This is due to the head of the bolt which holds the seat locking mechanism in place not lining up with the corresponding hole in the seat pan. Firmly grasp the rear of the seat and forcefully pull it forward while pressing down, the seat will lock into place. You may need two or three goes at it. If you still have problems, remove the rubber heat guard from between the tank and the seat and try again.
Now you know why you need the bike stabilised!
Note: after the seat has been on for a while the gel at the front of the seat deforms by about the 1 mm required and it does become easier to fit the seat. If you’re still having problems, you could “dremel” the the hole the bolt head fits into on the bottom of the seat pan about 1 mm longer.
Unlocking the seat needs a bit more force on the lever until the seat “beds in”.
Thoughts
This seat feels nice to the touch and looks fantastic. This seat is lovely once you get the knack of putting it on and taking it off. The seat is a little taller than the original. I used to be able to “flat-foot” both feet with the original seat now, I can’t quite flat-foot both feet simultaneously, but I can very easily get the balls of both feet on the ground. For reference I’m just over 5’8″ or 174 cm with a 30″ inside leg.
I’m very impressed with the seat so far and will go out and give it a thorough test and report back. So, in the next post I’ll give my thoughts on comfort, riding on it and using it on a regular basis. Until next time…
I’m not associated with this company in any way other than having bought and fully paid for one or more of their products. They are unaware that I am writing this review.
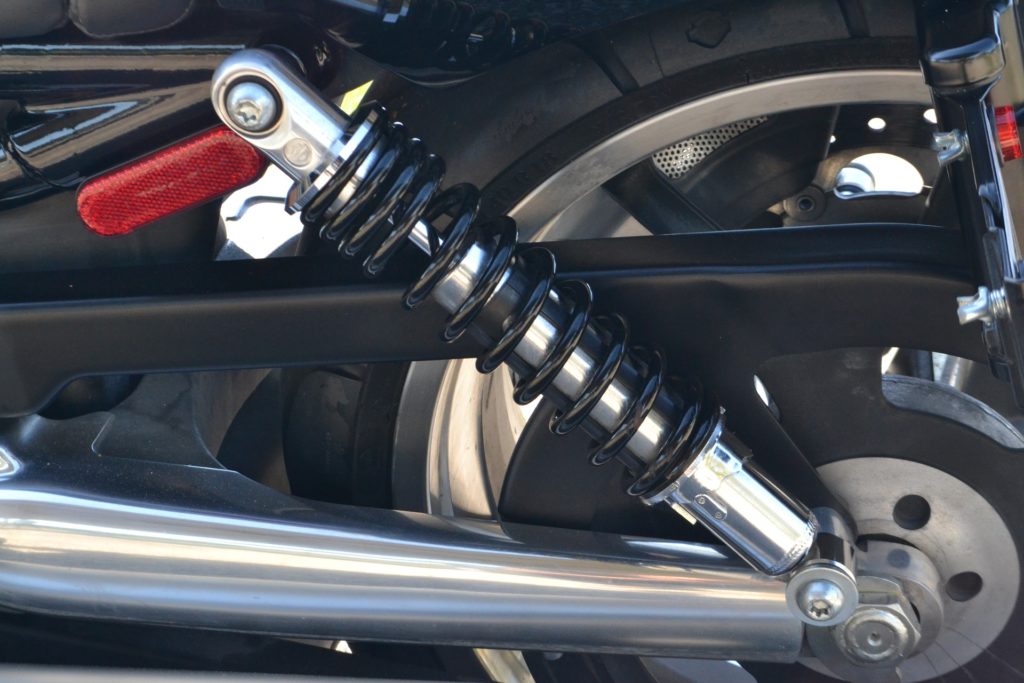
Correct suspension setup is essential for your motorcycle to handle correctly. A lot of motorcycles come just with very basic suspension setup – Spring Preload. You can usually only change the ride height of the rear suspension. That’s it!
In this article we’ll look at adjusting the Spring Preload. In other articles we’ll look at more complex suspension adjustments – compression and rebound damping.
Setting the Spring Preload correctly means the rear suspension for your bike is set up for your weight. Therefore the motorcycle handles better.
Some motorcycles only have 5 or 6 adjustment positions, others can have many more. You have to live with what your motorcycle has which, for most riders, will be adequate. If it isn’t, change the spring to one more suitable for your weight.
There is a more precise way to set up the rear suspension for your bike than the “seat of the pants” method used in the past. It involves a friend, or two if you don’t have a paddock stand, and a tape measure. Oh, and a pencil and paper to write everything down. If your friends are riders too, you can have a Rider Sag Suspension Setup Session.
1. Write down the current settings: how many turns in or out (your choice but usually out) the settings are currently set to. Note: the factory setting is usually in the manual, if all goes wrong reset to that!
2. Get off the bike . Lift the rear end to the limit of the suspension travel and let it drop back down, supporting the bike so it doesn’t fall over – a front wheel paddock stand is really useful here if you have one or a friend. There should be about 5 mm of drop – measure by eye. This is the Static Sag.
3. Measure the suspension height, in millimetres, from a suitable place e.g. top suspension bolt or bottom suspension bolt to a suitable point on the rear plastic or frame etc. (try to get as near vertical as possible) and write down this measurement immediately after doing the static sag.
4. Get on the bike, in full bike clothing with normal luggage and/or backpack, and sit as you would sit normally while riding, both feet on the pegs with either a paddock stand or friend holding the front of the bike. Measure the suspension again (as per item 3) and subtract it from the figure in item 3. This is called Rider Sag. The Rider Sag for a typical street setup should be about 35 mm – 40 mm (30 mm – 40 mm if there isn’t much adjustment available). Note: track Sag settings are different and shouldn’t be used on public roads as you’ll probably end up in a hedge at the first bump!
5. If there is more than one rear shock on your motorcycle, adjust both shocks equally (very important) until the desired Rider Sag is achieved. See your manual for the adjustment procedure. If you’ve loosened any nuts make sure they’re correctly tightened as per the manual. Now do your friends’ bikes…
6. Go for a test ride and adjust if necessary between the 30 mm and 40 mm range.
7. Recheck your Rider Sag about every 1,000 miles or so.
Now that your Rider Sag is setup correctly you should see a number of benefits:
Better handling, especially in the corners
A more comfortable ride
Better tyre wear – your tyres should last longer provided they’re correctly inflated.
Finally, remember to change the Rider Sag if you carry a pillion passenger or heavy items i.e. you go on a touring holiday.